Legal Notice: In order to use the following guide, it's really important for you to own legally an Original Amiga OS 3.9 Installation, along with a legal Kickstart 3.1.
Ok lets start...
To be able to run Remus and make the Custom ROMS the requirements are the following:
Hardware:
- Amiga OS3.0 and above.
- At least 1MB of free RAM
Software:
- MUI 3.8 (everyone has it anyway)
- Remus 1.0 (rc23) + ROMsplit 1.0 (rc15)
- Remus 1.0 (rc35 - update 27/07/2010)
- Remus 1.0 (rc36 - update 04/08/2011)
- BlizKick 1.24
- The MUI libraries bellow
* Nlist.mcc
* BetterString.mcc
* ToolBar.mcc
* TheBar.mcc
* PopupMenu.library
* UrlText.mcc (although optional)
- rxasl.library (used by Arexx scripts)
- rmh.library (used by Arexx scripts)
- xvs.library (for Anti-Virus usage)
Or you can get ALL the above in the following archive that I putted on my Dropbox here
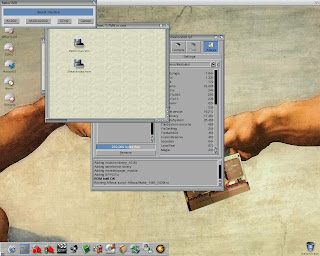
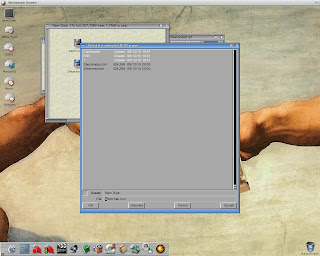
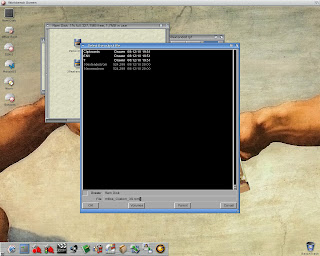
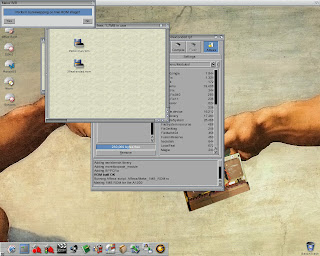
Once we install everything... We need to run the program ROMsplit in order for us to extract the modules from our Kickstart 3.1 ROM and from our BB2 ROM update (DEVS: AmigaOS ROM Update). So we either click "Grab ROM" for ROMsplit getting the contents from our Kickstart 3.1 ROM or... we search from our Partitions to find a legal 3.1 ROM in file for contents to appear. (1st pic has 3.9 Update while 2nd pic has the 3.1 Kickstart)
Once we have the contents loaded we click "Select All" for all contents to be selected and then we click "Extract file(s)".
Note: A folder will be created under DEVS: Modules/<Auto_Name_Depending_On_Kickstart_Version>
Next, we'll be running "Remus" which is the program which will help us make an image of our future custom Kickstart.
Lets get a bit familiar with the interface a bit...
1. Left side below toolbar are the contents that we're gonna put on our future ROM
2. Right side below toolbar are the folders/files from which we're gonna choose what to put into the left list.
In this screenshot for example I have in the right side a folder in which I have the following folders:
- 40.68(A1200) --> This is an extract of my A1200's 3.1 Kickstart ROM
- 44.57_ROMUpdate(3.9bb2) --> This is an extract from "AmigaOS ROM Update)
- BlizKick --> This is a copy of DEVS: Modules that were installed with BlizKick
In next step, we're creating a new Normal Kickstart by pressing the button "New" in toolbar, and we insert the info from the following screenshot:
Now, we only need to add the required files from our folders to the left side list.
As an example, I'm attaching the order of my files based on folder name.
IMPORTANT: YOU NEED to insert "Exec" first and then "1MB_ROM" module or else the Kickstart won't work at all!
- Modules/44.57_ROMUpdate(3.9bb2)/exec_45.20(A1200-A500)
- Others/Blizkick/1MB_ROM
- Modules/40.68(A1200)/audio.device_37.10
- Modules/40.68(A1200)/battclock.resource_39.3
- Modules/40.68(A1200)/battmem.resource_39.2
- Modules/44.57_ROMUpdate(3.9bb2)/bootmenu_44.7(68020)
- Modules/40.68(A1200)/card.resource_40.4
- Modules/40.68(A1200)/carddisk.resource_40.1
- Modules/40.68(A1200)/cia.resource_39.1
- Modules/40.68(A1200)/con-handler_40.2
- Modules/44.57_ROMUpdate(3.9bb2)/console.device_44.8
- Modules/40.68(A1200)/disk.resource_37.2
- Modules/40.68(A1200)/dos.library_40.3
- Modules/40.68(A1200)/expansion_40.2(A1200)
- Modules/44.57_ROMUpdate(3.9bb2)/filesystem.resource_45.10
- Modules/44.57_ROMUpdate(3.9bb2)/filesystem_45.13
- Modules/40.68(A1200)/gadtools.library_40.4
- Modules/40.68(A1200)/graphics.lib_40.24(AGA)
- Modules/40.68(A1200)/icon.library_40.1
- Modules/40.68(A1200)/intuition.library_40.85
- Modules/40.68(A1200)/input_40.1
- Modules/40.68(A1200)/keymap.library_40.4
- Modules/40.68(A1200)/layers.library_40.1
- LIBS:mathffp.library (These are my regged HSMathLibs that I included)
- LIBS:mathieeesingbas.library (These are my regged HSMathLibs that I included)
- Modules/40.68(A1200)/misc.resource_37.1
- Modules/40.68(A1200)/potgo.resource_37.4
- Modules/44.57_ROMUpdate(3.9bb2)/ram-handler_44.24_NoBss
- Modules/40.68(A1200)/ramdrive_39.35
- Modules/40.68(A1200)/ramlib_40.2
- Modules/40.68(A1200)/romboot_40.1
- System: Devs/scsi.device
- Modules/44.57_ROMUpdate(3.9bb2)/shell_45.7
- Modules/40.68(A1200)/timer.device_39.4
- Modules/40.68(A1200)/trackdisk.device_40.1
- Modules/40.68(A1200)/utility.library_40.1(020)
- Modules/40.68(A1200)/wbtask_39.1
Okey dokey...
As you will realize, we putted all the Modules of Kickstart 3.1 (with the same order as it existed on the Kickstart itself) but we changed some modules with the new ones from the extracted BB2 3.9 Update. That way we have a nice new Custom 3.9 Kickstart missing though Workbench.library and Intuition.library. No worries, we left them to save space, and we're gonna put them in the extended Kickstart (Hell yeah! 1MB ROM ftw) in a while...
Now, we're gonna click the button "Compile" in toolbar that will make the Kickstart under RAM:3.9normal.rom (if you kept the same name as the screenshot under "Settings" tab like mine)
(It's a good idea to save the template of your Normal Kickstart for future use like "MyCustomKickstart39_Normal.rpf")
Time for the extended Kickstart ROM now. We're clicking on "New" in toolbar and we insert the info from the following screenshot:
As we did before we need to add the required remaining files from our folders on the right to the right side modules.
As an example, I'm attaching the order of my files based on folder name.
IMPORTANT: YOU NEED to insert ROMHeader and DummyCDstrap (only if you use an BPPC or CSPPC accelerator) first, or else the Kickstart won't work at all!
- Others/RomHeader/romheader
- Others/DummyCDstrap/DummyCDstrap (This is optional module for BPPC and CSPPC accelerators)
- System:Libs/workbench.library
- DH0: Devs/morelibspace_module (This is AfA OS Morelibspace Module to avoid declaring it in Startup-Sequence!)
- DH0: Devs/Modules/BPPCFix (This is BPPCFix Module to avoid declaring it in Startup-Sequence!)
Cool! That was it

Now we only need to click "Compile" in the toolbar for the file to be created under RAM:3.9extended.rom (if you kept the same name as the screenshot under "Settings" tab like mine)
(It's a good idea to save the template of your Extended Kickstart for future use like "MyCustomKickstart39_Extended.rpf")
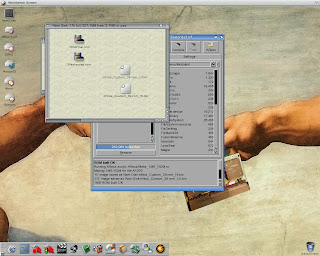
Now we have both the Normal+Extended ROMS under RAM:
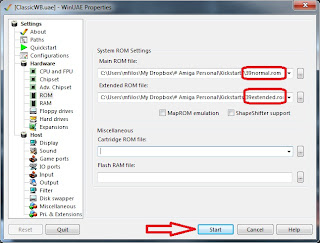
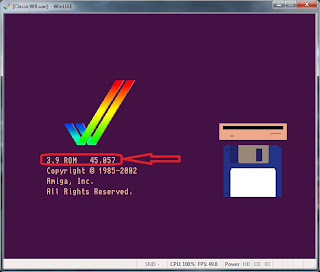
You can now easily check if you newly created Custom 3.9 Kickstart are working under WinUAE by inserting the ROMS in the corresponding area

Cool isn't it?

If you wanted this Custom Kickstart for your WinUAE environment then your work is done so congratulations and cya later

If you want this Custom Kickstart for your Classic Amiga... there's work to be done! Fear NOT though!... LETS GO!
We were back at the point where we had the 2xROMS in RAM Disk. From Remus now, we click the button "ARexx" and then on the submenu entry "1MB_ROM.rx". By pressing this option a window will appear asking our Amiga Model.
That is done just for Remus to split the ROM into 2 pieces (for A1200/A4000 etc) or into 1 piece (for A500/600/2000 etc).
Note: If you make custom kickstart for using under MapROM environments (like ACA630/ACA630 via ACATune utility) better choose A500/600/2000 to only get 1xOutput file instead of 2x that A1200/A4000 choice will
Next steps are selecting the Normal ROM image, the Extended ROM image and last but not least... The location+name where the "To-Burn-Image(s)" will be put...
The last step asks us if Remus should perform a ByteSwap operation for the ROM. Our choice will be based on the following:
- If you wanna burn the image to a Real Kickstart Image: then choose YES, since we won't need to byteswap it in the EPROM Programmer application - since Amiga requires ByteSwapping procedure for its ROMS).
- If you wanna use the image to kick it via MapROM (like for example on ACA6x0/ACA12xx accelerators via ACATune utility): then choose NO, since ACATune and general MapROM applications use normal (non-ByteSwapped) images. In that case... your ROM image is ready to be used so you can kick it right away by using the following line in you Startup-Sequence (according you have an ACA6x0/ACA12xx with ACATune utility installed):
C:ACATune -maprom <path & name of the kick file> <rest options> >NIL:
for example:
C:ACATune -maprom Devs:kick39_mfilos.rom -cache on -burst on >NIL:
If we done everything as intended... We must have 2x Files (since we choose A1200)
A you'll see on the screenshot the files that Remus created based on the filename that I gave was:
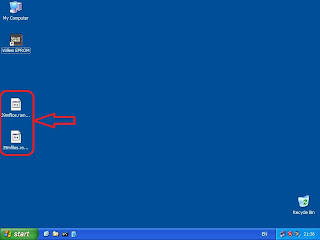
- mfilos_Custom_39.rom_LO.bin
- mfilos_Custom_39.rom_HI.bin
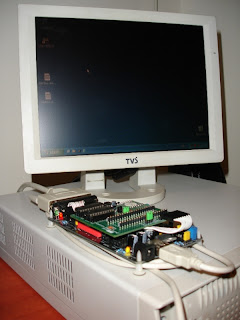
Bye bye Amiga... Time to use our trusted old PC where we have an El'Cheapo Parallel Willem Programmer.
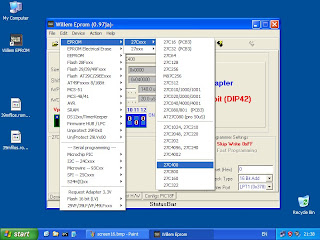
I won't go as deep as How to Install/Setup the Willem... But we need to choose to burn EPROM of type (at least in my example 27C400)
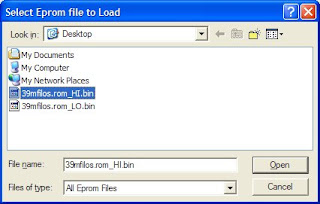
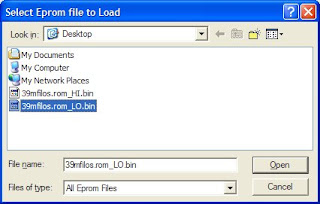
Next step is to "Load" one of our files (for example the 3.9_LO.bin)
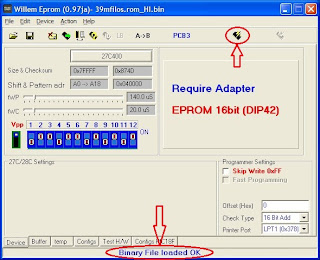
Yey! That was it. File is loaded succesfully so now it's time for us to BURN it by clicking the designated button in the toolbar!
Important: Make sure you're burning an erased by UV EPROM
Next step is to load the next file (for example the 3.9_HI.bin)
And repeat the procedure of Burning it.
--- VOILA! That's it dudes!


 ---
---Ok for testing your Kickstarts now make sure that...
For A1200
- You insert the EPROM burned from LO file into the U6B Kickstart socket (top)
- You insert the EPROM burned from HI file into the U6A Kickstart socket (bottom)
For A3000 - thx to drbrain for the clarification
- You insert the EPROM burned from LO file into the U181 Kickstart socket (top)
- You insert the EPROM burned from HI file into the U180 Kickstart socket (bottom)
- You insert the EPROM burned from LO file into the U176 Kickstart socket (bottom)
- You insert the EPROM burned from HI file into the U175 Kickstart socket (top)
Time to change some stuff:
- Move the file in DEVS: "AmigaOS ROM Update" to another folder, or Rename it to something else.
- Comment the line you have for SetPatch and insert the following SetPatch declaration instead:
C:SetPatch NOROMUPDATE QUIET
If you had other declarations like me for example:
- C:BPPCFix install >NIL:
or
- C:Morelibspace
you can comment them also if you included them in the Custom 3.9 ROM.
That's all folks. I hope this guide will be useful to someone else but me.
P.S. I'm attaching an example of my Custom Kickstart Remus files (renamed to .txt). You just need to alter the location of the folders if you wanna try them out.
----------------------------------------------------------------------
EDIT:
Since I was tinkering with creating a Custom Kickstart 3.9 for an Amiga A4000D I found and solved the following problems:
Problem:
A4000 doesn't support >512KB ROMS which can be a problem for custom 1MB ROMS
Solution:
Create your custom rom as a 512KB as my guide says but you exclude the 1MB_ROM module (if you use the 3.1 exec, or 3.9 exec).
We'll leave outside though Workbench.library which is rather big and can't be left out (can be put in hard drive's LIBS: folder with no problem). You'd should include the WBFind module in your ROM as well as it's a module that tells the system that the Workbench.library exists in SYS:Libs
Problem:
Since we're not making an 1MB ROM (we'll only make Normal ROM without Extended), we can't actually use Doobrey's awesome Make_1MB_ROM Arexx script (since it combines normal/extended, and splits and byteswaps according to your need).
Using utilities like most guys suggest in forums (WinHex) is cool, but it was certainly uncool for me to register WinHex (45 euro) just to dissect the 512KB ROM file to even/odd files.
Solution:
After checking Doobrey's script, I managed to realise that you only need to use his tool SplitRROMImage that exists in "Tools" folder under Remus installation folder.
The declaration of the command is fairly simple:
SplitROMImage <your_512kb_rom_name> SWAP
(SWAP is optional and it only ByteSwaps your files for using it under your Eprom Burner)
In my example: SplitROMIMage kick39_a4000.rom SWAP
...created 2 files:
Now you can get these files and burn them to your programer (in 256KB EPROMS).
Note: If you want to write your custom Kickstart to 512KB EPROMS (like 27C400) you'd need to double the HI and LO images (since they are 256KB in size) before burning them or else the Kickstart won't work. To double these images, the easiest way is to use the DOS Command Prompt like this:
C:\> copy kick39_a4000.rom.hi /B+kick39_a4000.rom.hi /B kick39_a4000_512.rom.hi /B
C:\> copy kick39_a4000.rom.lo /B+kick39_a4000.rom.lo /B kick39_a4000_512.rom.lo /B
That way you created 2 new files (kick39_a4000_512.rom.hi and kick39_a4000_512.rom.lo) which now you can burn to the 27C400 EPROMS just fine :)
That's all folks. I hope this guide will be useful to someone else but me.
P.S. I'm attaching an example of my Custom Kickstart Remus files (renamed to .txt). You just need to alter the location of the folders if you wanna try them out.
----------------------------------------------------------------------
EDIT:
Since I was tinkering with creating a Custom Kickstart 3.9 for an Amiga A4000D I found and solved the following problems:
Problem:
A4000 doesn't support >512KB ROMS which can be a problem for custom 1MB ROMS
Solution:
Create your custom rom as a 512KB as my guide says but you exclude the 1MB_ROM module (if you use the 3.1 exec, or 3.9 exec).
We'll leave outside though Workbench.library which is rather big and can't be left out (can be put in hard drive's LIBS: folder with no problem). You'd should include the WBFind module in your ROM as well as it's a module that tells the system that the Workbench.library exists in SYS:Libs
Problem:
Since we're not making an 1MB ROM (we'll only make Normal ROM without Extended), we can't actually use Doobrey's awesome Make_1MB_ROM Arexx script (since it combines normal/extended, and splits and byteswaps according to your need).
Using utilities like most guys suggest in forums (WinHex) is cool, but it was certainly uncool for me to register WinHex (45 euro) just to dissect the 512KB ROM file to even/odd files.
Solution:
After checking Doobrey's script, I managed to realise that you only need to use his tool SplitRROMImage that exists in "Tools" folder under Remus installation folder.
The declaration of the command is fairly simple:
SplitROMImage <your_512kb_rom_name> SWAP
(SWAP is optional and it only ByteSwaps your files for using it under your Eprom Burner)
In my example: SplitROMIMage kick39_a4000.rom SWAP
...created 2 files:
- kick39_a4000.rom.hi (256kb)
- kick39_a4000.rom.lo (256kb)
Now you can get these files and burn them to your programer (in 256KB EPROMS).
Note: If you want to write your custom Kickstart to 512KB EPROMS (like 27C400) you'd need to double the HI and LO images (since they are 256KB in size) before burning them or else the Kickstart won't work. To double these images, the easiest way is to use the DOS Command Prompt like this:
C:\> copy kick39_a4000.rom.hi /B+kick39_a4000.rom.hi /B kick39_a4000_512.rom.hi /B
C:\> copy kick39_a4000.rom.lo /B+kick39_a4000.rom.lo /B kick39_a4000_512.rom.lo /B
That way you created 2 new files (kick39_a4000_512.rom.hi and kick39_a4000_512.rom.lo) which now you can burn to the 27C400 EPROMS just fine :)
Disclaimer: I haven't burned this ROMS myself to use them on a real A4000 but others did and it works just fine :)





 but... if you check my previous post... you will see that the actual photo was 100% implemented as my design was.

